现在这里开个坑,这个系列带着做一下shadertoy的一些案例,我不是这方面的大神,这个系列教程大概只能算基础教学(目录在下方),所以这个系列教程没有任何压力,有手就能学会。

1
2
3
教程1. 开发环境配置与介绍
教程2. 语法与调试
教程3. 迁移脚本到游戏引擎

如果你是一个游戏开发者那么对Shader应该不会陌生,UE的Shader用的是HLSL,Unity兼容HLSL,与GLSL主推cg(HLSL)。那么shadertoy主要用的是什么语言呢?GLSL 当然要在unity或者ue使用shadertoy的代码怎么去做这个兼容后面的文章我们再聊一下,本篇就不作教学。

本系列的教程主要兴趣导向的,所以有时间的话可以玩玩看。

网站

https://www.shadertoy.com 下方的介绍来自维基百科

Shadertoy is an online community and platform for computer graphics professionals, academics[1] and enthusiasts who share, learn and experiment with rendering techniques and procedural art through GLSL code. There are more than 52 thousand public contributions as of mid-2021 coming from thousands of users. WebGL[2] allows Shadertoy to access the compute power of the GPU to generate procedural art, animation, models, lighting, state based logic and sound.

Shadertoy是一个在线社区和平台,面向计算机图形专业人员、学者[1]和爱好者,他们通过GLSL代码共享、学习和实验渲染技术和程序艺术。截至21年年中,有超过52000个公共捐款来自数千名用户。WebGL[2]允许Shadertoy访问GPU的计算能力,以生成程序艺术、动画、模型、照明、基于状态的逻辑和声音。

VsCode的插件安装

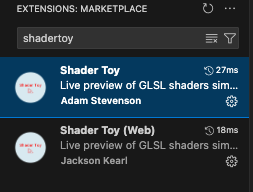
插件名: shadertoy 注意是第一个
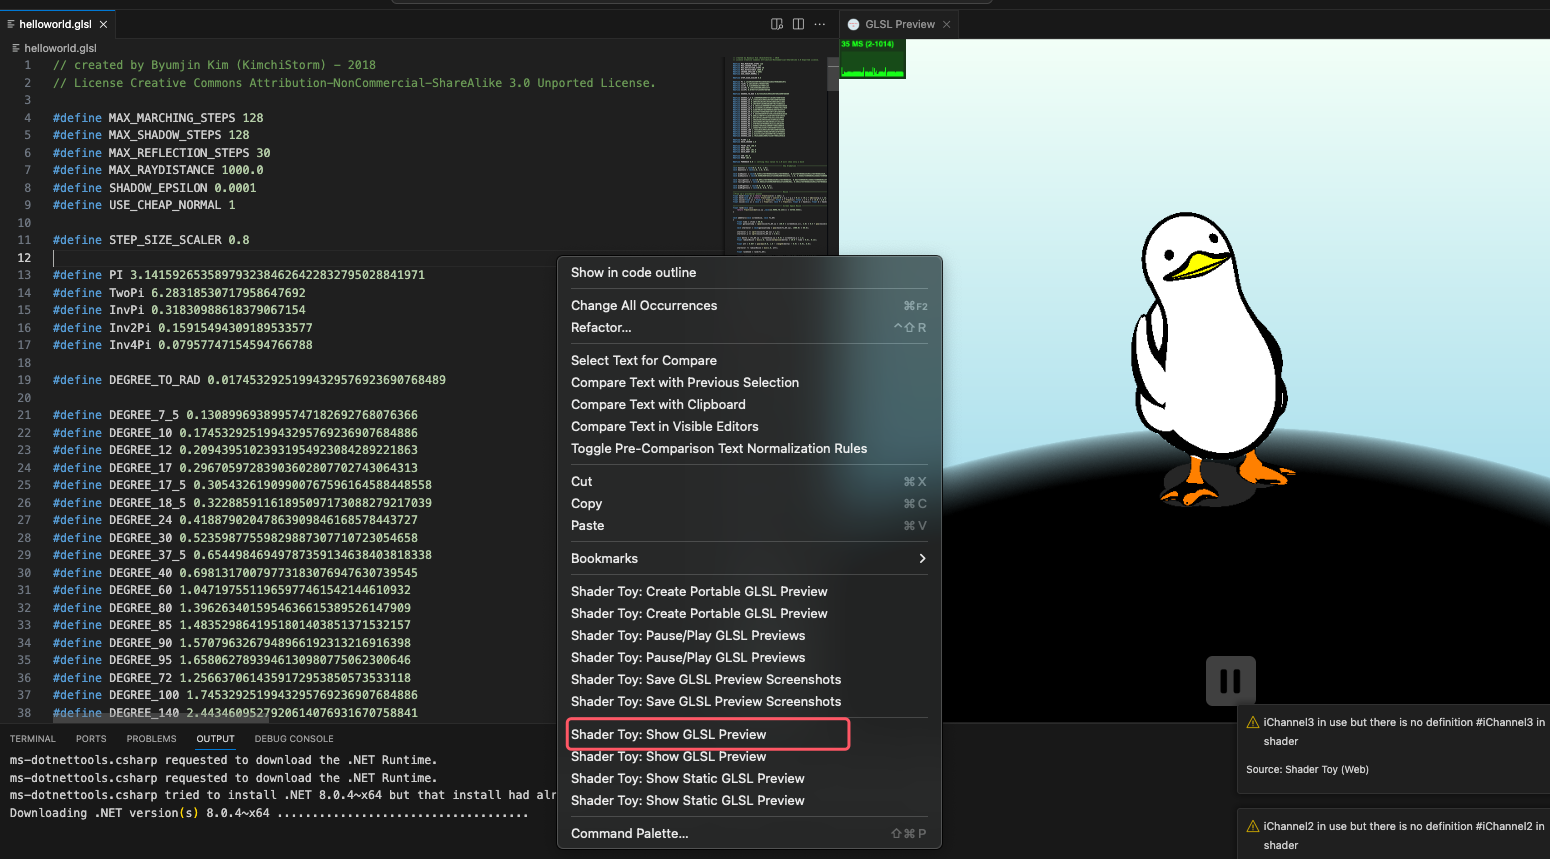
安装完毕预览图glsl文件效果

下载与调试

在shadertoy上找到你想要下载的代码,复制并在本地创建一个glsl文件,如果有报错信息就会在右侧预览中显示。

你可以直接复制下面的代码到本地创建一个名为cube.glsl的文件。

1
2
3
4
5
6
7
8
9
10
11
12
13
14
15
16
17
18
19
20
21
22
23
24
25
26
27
28
29
30
31
32
33
34
35
36
37
38
39
40
41
42
43
44
45
46
47
48
49
50
51
52
53
54
55
56
57
58
59
60
61
62
63
64
65
66
67
68
69
70
71
72
73
74
75
76
77
78
79
80
81
82
83
84
85
86
87
88
89
90
91
92
93
94
95
96
97
98
99
100
101
102
103
104
105
106
107
108
109
110
111
112
113
114
115
116
117
118
119
120
121
122
123
124
125
126
127
128
129
130
131
132
133
134
135
136
137
138
139
140
141
142
143
144
145
146
147
148
149
150
151
152
153
154
155
156
157
158
159
160
161
162
163
164
165
166
167
168
169
170
171
172
173
174
175
176
177
178
179
180
181
182
183
184
185
186
187
188
189
190
191
192
193
194
195
196
197
198
199
200
201
202
203
204
205
206
207
208
209
210
211
212
213
214
215
216
217
218
219
220
221
222
223
224
225
/**
* Part 3 Challenges
* - Make the camera move up and down while still pointing at the cube
* - Make the camera roll (stay looking at the cube, and don't change the eye point)
* - Make the camera zoom in and out
*/

const int MAX_MARCHING_STEPS = 255;
const float MIN_DIST = 0.0;
const float MAX_DIST = 100.0;
const float EPSILON = 0.0001;

/**
* Signed distance function for a cube centered at the origin
* with width = height = length = 2.0
*/
float cubeSDF(vec3 p) {
// If d.x < 0, then -1 < p.x < 1, and same logic applies to p.y, p.z
// So if all components of d are negative, then p is inside the unit cube
vec3 d = abs(p) - vec3(1.0, 1.0, 1.0);

// Assuming p is inside the cube, how far is it from the surface?
// Result will be negative or zero.
float insideDistance = min(max(d.x, max(d.y, d.z)), 0.0);

// Assuming p is outside the cube, how far is it from the surface?
// Result will be positive or zero.
float outsideDistance = length(max(d, 0.0));

return insideDistance + outsideDistance;
}

/**
* Signed distance function for a sphere centered at the origin with radius 1.0;
*/
float sphereSDF(vec3 p) {
return length(p) - 1.0;
}

/**
* Signed distance function describing the scene.
*
* Absolute value of the return value indicates the distance to the surface.
* Sign indicates whether the point is inside or outside the surface,
* negative indicating inside.
*/
float sceneSDF(vec3 samplePoint) {
return cubeSDF(samplePoint);
}

/**
* Return the shortest distance from the eyepoint to the scene surface along
* the marching direction. If no part of the surface is found between start and end,
* return end.
*
* eye: the eye point, acting as the origin of the ray
* marchingDirection: the normalized direction to march in
* start: the starting distance away from the eye
* end: the max distance away from the ey to march before giving up
*/
float shortestDistanceToSurface(vec3 eye, vec3 marchingDirection, float start, float end) {
float depth = start;
for (int i = 0; i < MAX_MARCHING_STEPS; i++) {
float dist = sceneSDF(eye + depth * marchingDirection);
if (dist < EPSILON) {
return depth;
}
depth += dist;
if (depth >= end) {
return end;
}
}
return end;
}


/**
* Return the normalized direction to march in from the eye point for a single pixel.
*
* fieldOfView: vertical field of view in degrees
* size: resolution of the output image
* fragCoord: the x,y coordinate of the pixel in the output image
*/
vec3 rayDirection(float fieldOfView, vec2 size, vec2 fragCoord) {
vec2 xy = fragCoord - size / 2.0;
float z = size.y / tan(radians(fieldOfView) / 2.0);
return normalize(vec3(xy, -z));
}

/**
* Using the gradient of the SDF, estimate the normal on the surface at point p.
*/
vec3 estimateNormal(vec3 p) {
return normalize(vec3(
sceneSDF(vec3(p.x + EPSILON, p.y, p.z)) - sceneSDF(vec3(p.x - EPSILON, p.y, p.z)),
sceneSDF(vec3(p.x, p.y + EPSILON, p.z)) - sceneSDF(vec3(p.x, p.y - EPSILON, p.z)),
sceneSDF(vec3(p.x, p.y, p.z + EPSILON)) - sceneSDF(vec3(p.x, p.y, p.z - EPSILON))
));
}

/**
* Lighting contribution of a single point light source via Phong illumination.
*
* The vec3 returned is the RGB color of the light's contribution.
*
* k_a: Ambient color
* k_d: Diffuse color
* k_s: Specular color
* alpha: Shininess coefficient
* p: position of point being lit
* eye: the position of the camera
* lightPos: the position of the light
* lightIntensity: color/intensity of the light
*
* See https://en.wikipedia.org/wiki/Phong_reflection_model#Description
*/
vec3 phongContribForLight(vec3 k_d, vec3 k_s, float alpha, vec3 p, vec3 eye,
vec3 lightPos, vec3 lightIntensity) {
vec3 N = estimateNormal(p);
vec3 L = normalize(lightPos - p);
vec3 V = normalize(eye - p);
vec3 R = normalize(reflect(-L, N));

float dotLN = dot(L, N);
float dotRV = dot(R, V);

if (dotLN < 0.0) {
// Light not visible from this point on the surface
return vec3(0.0, 0.0, 0.0);
}

if (dotRV < 0.0) {
// Light reflection in opposite direction as viewer, apply only diffuse
// component
return lightIntensity * (k_d * dotLN);
}
return lightIntensity * (k_d * dotLN + k_s * pow(dotRV, alpha));
}

/**
* Lighting via Phong illumination.
*
* The vec3 returned is the RGB color of that point after lighting is applied.
* k_a: Ambient color
* k_d: Diffuse color
* k_s: Specular color
* alpha: Shininess coefficient
* p: position of point being lit
* eye: the position of the camera
*
* See https://en.wikipedia.org/wiki/Phong_reflection_model#Description
*/
vec3 phongIllumination(vec3 k_a, vec3 k_d, vec3 k_s, float alpha, vec3 p, vec3 eye) {
const vec3 ambientLight = 0.5 * vec3(1.0, 1.0, 1.0);
vec3 color = ambientLight * k_a;

vec3 light1Pos = vec3(4.0 * sin(iTime),
2.0,
4.0 * cos(iTime));
vec3 light1Intensity = vec3(0.4, 0.4, 0.4);

color += phongContribForLight(k_d, k_s, alpha, p, eye,
light1Pos,
light1Intensity);

vec3 light2Pos = vec3(2.0 * sin(0.37 * iTime),
2.0 * cos(0.37 * iTime),
2.0);
vec3 light2Intensity = vec3(0.4, 0.4, 0.4);

color += phongContribForLight(k_d, k_s, alpha, p, eye,
light2Pos,
light2Intensity);
return color;
}

/**
* Return a transform matrix that will transform a ray from view space
* to world coordinates, given the eye point, the camera target, and an up vector.
*
* This assumes that the center of the camera is aligned with the negative z axis in
* view space when calculating the ray marching direction. See rayDirection.
*/
mat4 viewMatrix(vec3 eye, vec3 center, vec3 up) {
// Based on gluLookAt man page
vec3 f = normalize(center - eye);
vec3 s = normalize(cross(f, up));
vec3 u = cross(s, f);
return mat4(
vec4(s, 0.0),
vec4(u, 0.0),
vec4(-f, 0.0),
vec4(0.0, 0.0, 0.0, 1)
);
}

void mainImage( out vec4 fragColor, in vec2 fragCoord )
{
vec3 viewDir = rayDirection(45.0, iResolution.xy, fragCoord);
vec3 eye = vec3(8.0, 5.0, 7.0);

mat4 viewToWorld = viewMatrix(eye, vec3(0.0, 0.0, 0.0), vec3(0.0, 1.0, 0.0));

vec3 worldDir = (viewToWorld * vec4(viewDir, 0.0)).xyz;

float dist = shortestDistanceToSurface(eye, worldDir, MIN_DIST, MAX_DIST);

if (dist > MAX_DIST - EPSILON) {
// Didn't hit anything
fragColor = vec4(0.0, 0.0, 0.0, 0.0);
return;
}

// The closest point on the surface to the eyepoint along the view ray
vec3 p = eye + dist * worldDir;

vec3 K_a = vec3(0.2, 0.2, 0.2);
vec3 K_d = vec3(0.7, 0.2, 0.2);
vec3 K_s = vec3(1.0, 1.0, 1.0);
float shininess = 10.0;

vec3 color = phongIllumination(K_a, K_d, K_s, shininess, p, eye);

fragColor = vec4(color, 1.0);
}

创建文件后打开预览发现有报错

很显然上面显示的是一个重复函数名的报错,我们找到上面对应的函数 viewMatrix,将其与相关引用改为 viewMatrix1

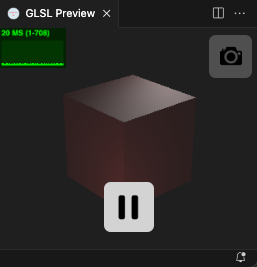
现在我们可以看到渲染出一个红色方块,并且随着光照有不同的明暗变化。

本文引用资料

官方教程

https://inspirnathan.com/posts/47-shadertoy-tutorial-part-1

文章开头视频的脚本地址

https://www.shadertoy.com/view/4sdcz8