UNITY3D Playables API 实践(上)
0 条评论概述
Playables API 推出已经一年有余(2017–07–04 New in Unity 2017.1)。即使你没时间其他的新功能, 也应该看看这个 Playable API .做过大型游戏的同学无论你是做过 2D或3D 只要使用过 Animaiton Controller,或多或少体会过被 蜘蛛网(复杂状态机过渡) 支配的恐惧。当下有了 Playable API 可供使用,我们能轻易的向 Legacy animation API 的使用习惯靠拢 — 高效及易于定制。
在我看来 Playable API 的目的就是为了替换掉Legacy动画系统,并且兼容Timeline(本篇不介绍timeline 感兴趣的可以自己去看看)。总的一个词概括就是 【dynamically】,如同使用组件一般的灵活。
目前我在测试中使用了 UNITY2018.1+ 编辑器。如果不使用该可视化插件您在 UNITY5.x 版本就能使用
Playable API。 使用5.x版本的Playable API 时请注意后续的代码API变更,某些函数名或调用方式可能已经更改,如果从未使用过 建议从 UNITY2017+ 开始入手。
准备工作(可跳过)
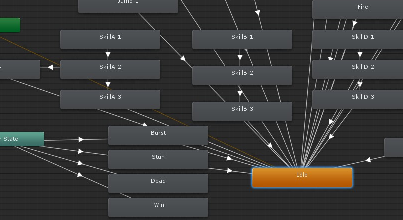
调试工具 graph-visualizer
我们先Clone UNITY TECHNOLOGIES 提供的 Playable 可视化工具,便于后续的理解与调试。
1 | git clone https://github.com/Unity-Technologies/graph-visualizer |
我在这里直接克隆到测试工程中,目前此工具支持的UNITY版本如下:
| Unity version | Release |
|---|---|
| 2018.1+ | v2.2 (master) |
| 2017.1+ | v1.1 |
如何使用
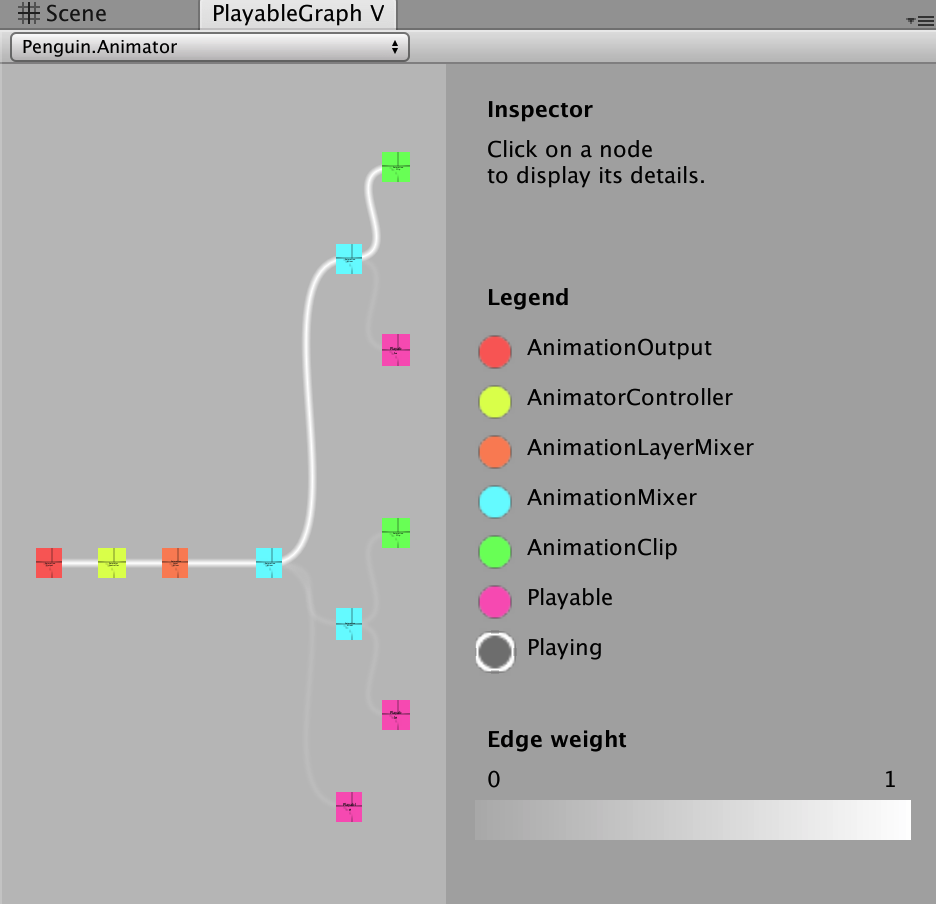
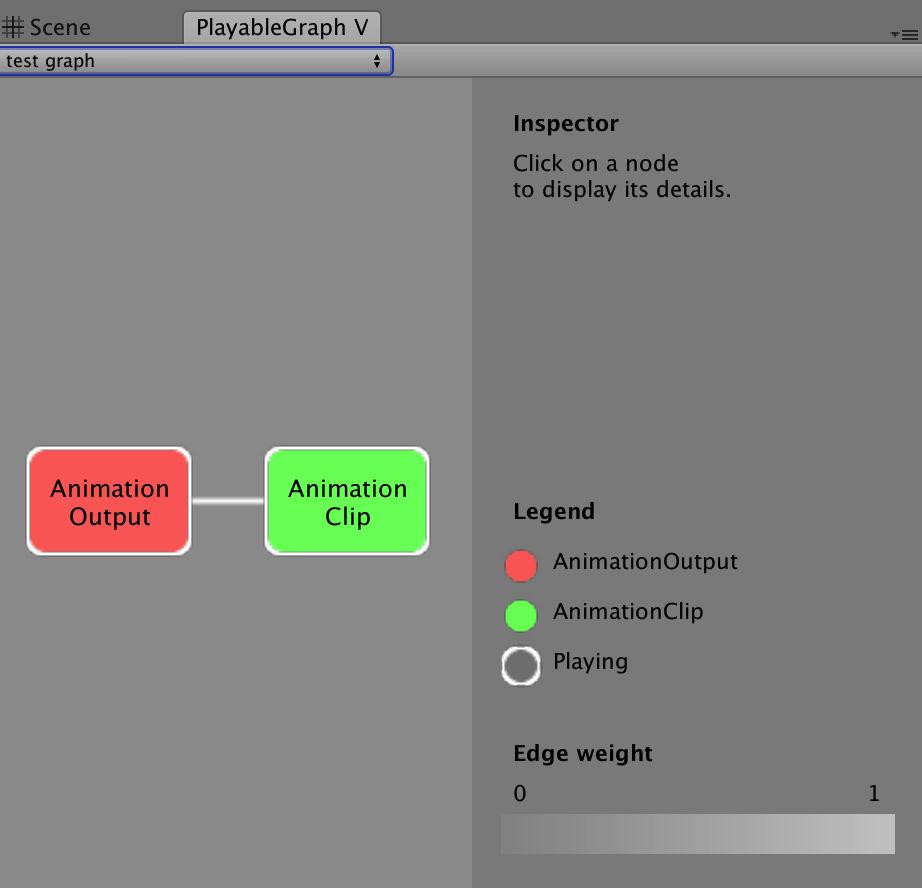
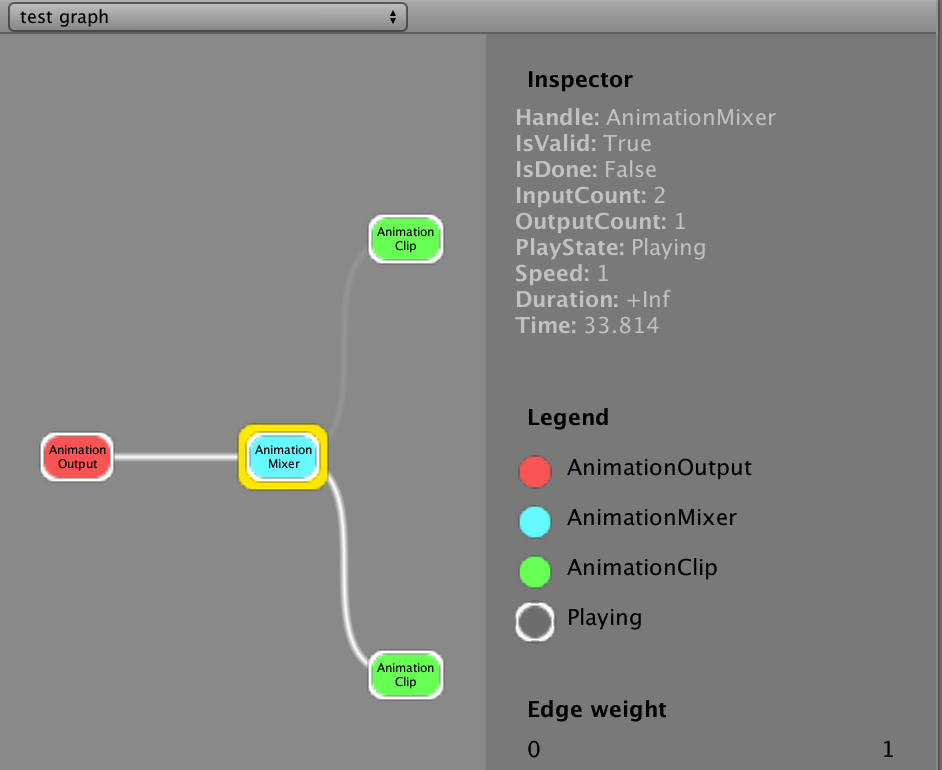
Playable基础结构
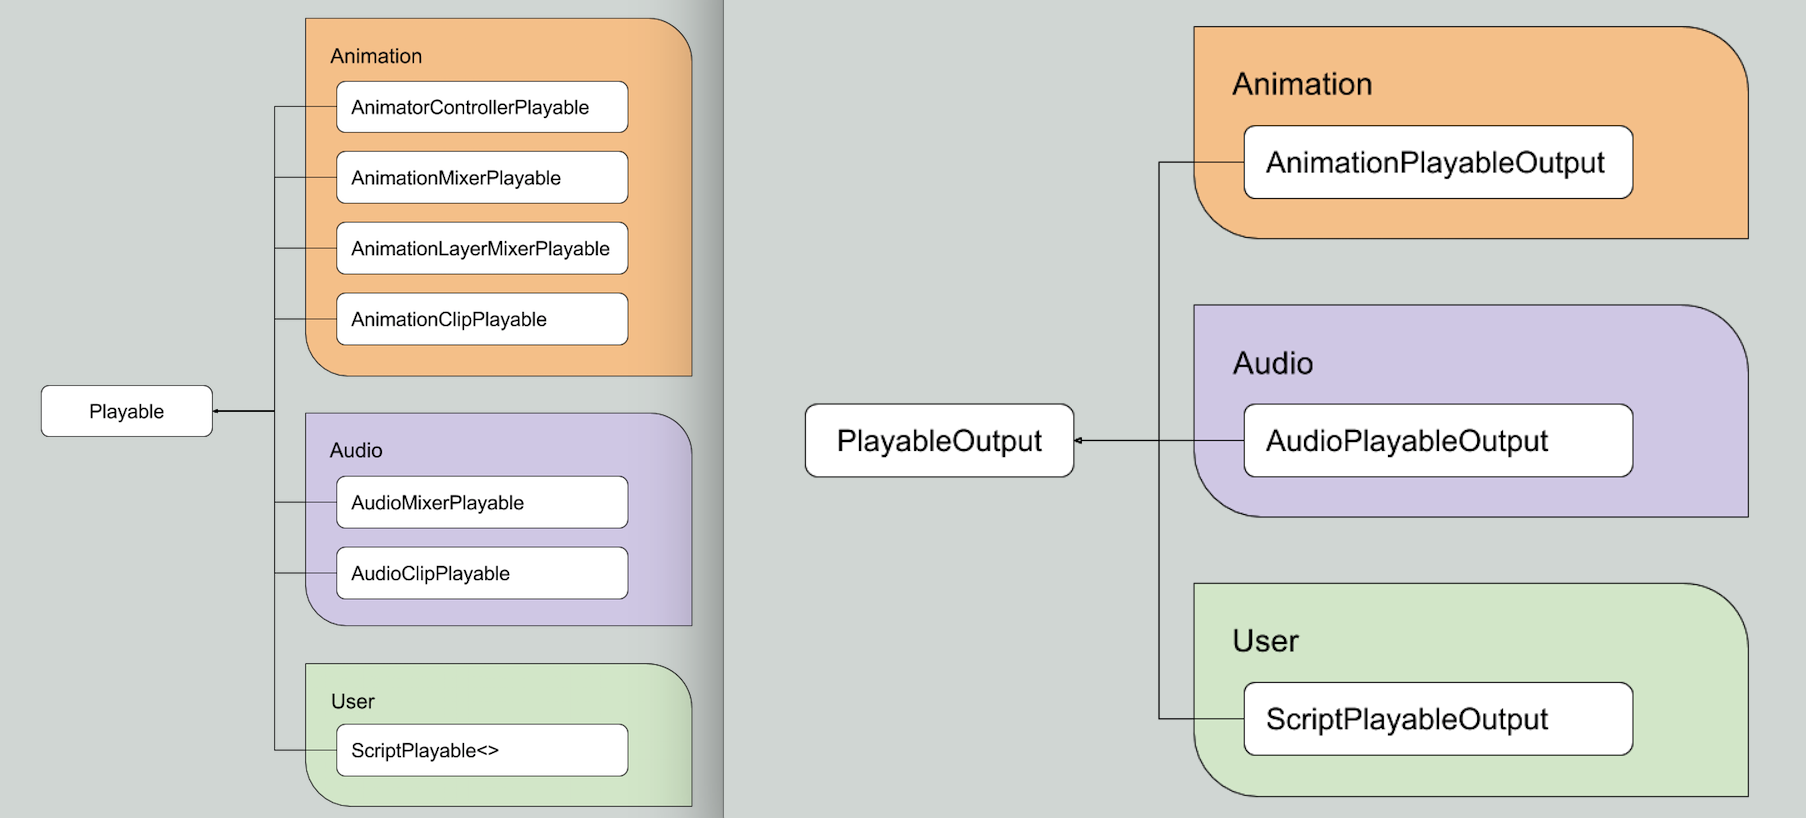
这两个结构体是我们最需要关注的部分,我们可以结合上文的 PlayableGraph 例图来总结一下规律。 AnimationOutput 是根节点,Playable 是可以通过 后为XXXXXMixerPlayable 来进行组合 或 单独使用,并且至少有一个才能构成最简单的 PlayableGraph。
快速上手案例 动画的播放
创建一个最基础的 PlayableGraph
1 | playableGraph = PlayableGraph.Create("test graph"); |
⚠️ 您同样可以使用一行代码就能调用此动画,这里需要注意的是Animator不能为空,否则编辑器会直接crash而不报异常。
1 | AnimationPlayableUtilities.PlayClip(GetComponent<Animator>(), clip, out playableGraph); |
创建最基础的两动画融合
1 | playableGraph = PlayableGraph.Create("test graph"); |
混合使用 AnimationClip 与 AnimatorController
修改上文【创建最基础的两动画融合】所提供的代码块 即可。AnimatorController 可以看作是一颗子树,它可以轻易的使用mixerPlayable与其他的clip进行融合,这一切的便利归功于UNITY重写的通用动画调用层。
在视频中您可以观察最左侧在融合权重的变化下两颗树的融合情况:
1 | var clipPlayable2 = AnimatorControllerPlayable.Create(playableGraph, controller); |
增加 PlayableGraph 的输出口(类型)
看到这里我们应该慢慢的有一些概念了
记忆技巧:右输入口(数量) 左输出口(数量)。 这两个东西贯穿整体的设计中。即使最基础的 playable 组件都有这两个属性。这两个属性也是我们设计一棵树的常规操作。PlayableGraph 就是这颗树,额外需要理解的是: 它允许(限制了) 我们需要用不同 类型的主分支 然后才扩展出其他分支。
⚠️ 所有子节点初始化的时候都没有设置输出输入端口数量 您需要手动指派。否则会报错:Connecting invalid input
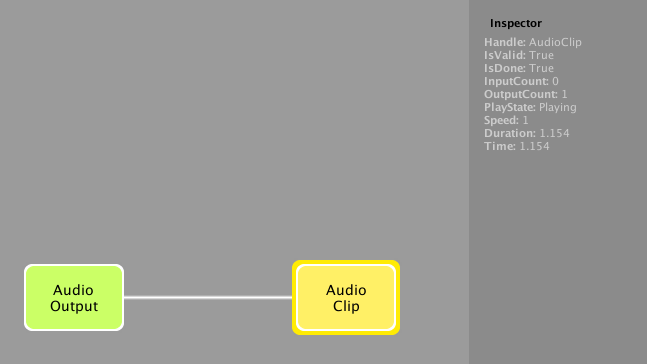
目前我们已经用过了AnimationPlayableOutput 下面演示一些 AudioPlayableOutput 的案例。
1 | playableGraph = PlayableGraph.Create(); |
控制PlayableGraph(树)中的状态切换
因为 XXXPlayable 都是继承自同接口,以下函数同样适用于其他类型。
1 | audioClipPlayable.Pause(); //暂停 |
参考代码片段
1 | private float i = 0; |
控制树的时间
因为 XXXPlayable 都是继承自同接口,以下函数同样适用于其他类型。
1 | public float time; |
在视频中您可以观察时间的前进与后退直接作用于当前动画节点:
使用 PlayableBehaviour
顾名思义 PlayableBehaviour 就是自己定义的Playable行为,我们实现了一个 PlayQueuePlayable 并且制定一些特殊的逻辑在其中(循环播放clip)。
我们先看下它是如何初始化的:
1
2
3var playQueuePlayable = ScriptPlayable<PlayQueuePlayable>.Create(playableGraph);//泛型工厂
var playQueue = playQueuePlayable.GetBehaviour();//容器函数 获取饮用
playQueue.Initialize(clipsToPlay, playQueuePlayable, playableGraph);//用户自定义初始化函数从第二行代码中使用了泛型工厂来创建 playablebehavior 我们可以看出它是一个通用的容器,而并是开箱即用的树节点。
容器初始化完毕,将它设置为主动画分支的下一级节点,操作完毕。
1
2
3var playableOutput = AnimationPlayableOutput.Create(playableGraph, "Animation", GetComponent<Animator>());
playableOutput.SetSourcePlayable(playQueuePlayable,0);
playableGraph.Play();
那么现在我们已经了解了如何使用这个容器。现在开始探究容器的内部实现:
1 | public virtual void OnGraphStart(Playable playable){} |
我们可以看到,动画周期内的大部分检测与判断我们都能在这里进行.
最后我们再看一下自定义类 PlayQueuePlayable 的行为逻辑。
上文提到的 Initialize 函数,这里动态创建了 AnimationClipPlayable 并且指派端口链接到了 PlayQueuePlayable
1
2
3
4
5
6
7
8
9
10
11public void Initialize(AnimationClip[] clipsToPlay, Playable owner, PlayableGraph graph)
{
owner.SetInputCount(1);
mixer = AnimationMixerPlayable.Create(graph, clipsToPlay.Length);
graph.Connect(mixer, 0, owner, 0);
for (int clipIndex = 0 ; clipIndex < mixer.GetInputCount() ; ++clipIndex)
{
graph.Connect(AnimationClipPlayable.Create(graph, clipsToPlay[clipIndex]), 0, mixer, clipIndex);
}
}重写 PrepareFrame 函数,用来检测动画帧在播放前的逻辑(一帧调一次) 这里需要避免复杂的检测逻辑,我们实现了简单的轮播逻辑:让动画一个接一个的切换。
1 | private int m_CurrentClipIndex = -1; |
小结
本章节带大家过了一遍Playables API的基本使用,并且抛砖引玉的进行了一些技巧讲解,相信经过本章节的学习大家一定对 Playables API 充满了兴趣,在下一章我们讲讲更详细的 手部IK 与 分层动画 的运用。我们可以借此实现人物的攀爬/射击/复杂运动等。